

I picked all of the beets that were big enough to can, and it sure seemed like I had a lot. But after I got them all packed into jars, I realized that I only had 2 quarts. There are still more to pick, but they're still small yet. I think I posted directions for pickling beets before (1 part sugar to 1 part vinegar with cinnamon to taste), but I actually canned this batch. Leave a 1/2" of headspace to allow for expansion and process in a water bath canner for 30 minutes. I kept mine whole (just like my grandparents used to), except for the few that were just too big to can whole.
I also trimmed up my rosemary plant today. It was a Christmas gift, and it's been growing nicely in a pot in my windowsill. I'm hoping the trimming will encourage new growth, but the pot might simply be restricting the roots too much (it will obviously never get as big as it could outside in the ground as long as it stays in the pot). I might have to transplant it soon.
Artichokes were getting out of hand at the farm, and nobody was eating them. I decided to make an artichoke pesto. I had over 20 artichokes, but most of them were small. They were starting to open up, and once they bloom they're not much good for eating. I boiled the artichokes for 40 minutes in two batches and then put the artichoke hearts in a blender with the rosemary I'd trimmed off, about 10 cloves of garlic, some lemon juice, a bit of sea salt, a good helping of of olive oil, and almonds (the only nuts I had on hand). It smells and tastes great (the bit I sampled at least). I had a great artichoke pesto with sun-dried tomatoes at Veganopolis, in Portland... and I really wish I had sun-dried tomatoes for mine. It's still good though, and I'm looking forward to having some on pasta or a sandwhich/wrap. Tonight's dinner was artichoke petals, and more than I knew what to do with.
I think I mentioned that I was going to be doing (or, at least see about doing) some gardening out at my grandfather's house. I used Google Earth to estimate that the gardening area is between 7 and 8,000 sq. ft. The sprinkler I'm planning on getting has a range of just under 4,000 sq. ft. at the maximum PSI. And oscillating sprinklers have the best range, though at the expense of watering efficiency. The biggest problems with oscillating sprinklers is that the water can be carried away by the wind because it's being spraying higher in the air than with other types of sprinklers, and for the same reason, more of it is likely to be evaporated. Watering early in the morning should help me alleviate both of these problems.
As best as I can tell, the 4,000 sq. ft. that this sprinkler will cover is already larger than the area that my grandfather used to plant in, so it sounds like a good start to me. And, I won't be out at my grandfather's house daily, so I need something that will cover a large area without needing to be moved around (or without the need to purchase more than one). With an automatic timer I can set the sprinkler to run every morning, whether I'm there or not. That way I know my plants are getting the water they need. Outside of this 4,000 sq. ft. area I'll plant drought resistant plants, or plants with lower watering requirements... probably perennials like fruit trees (although, fruit trees will require more water during the first year or two as they get established).
This is all theoretical of course, especially since I don't really have a way to get to my grandfather's without catching a ride. He's way out in the country, I don't drive, and I'm currently bike-less. But these are only minor obstacles. I should have a clover crop sown in August, and I'll till it in in the spring and get started on planting a real garden.
Thursday, July 10, 2008
Wednesday, July 09, 2008
I've been really excited about espalier fruit trees ever since I read about them in John Seymour's The Self-sufficient Life and How to Live It. My interest was renewed when I was sitting at the farmers' market today next to a guy that was selling apple trees, among other things. I'm thinking about putting down a cover crop at my grandfather's place to start getting the soil ready for next season, since the soil is in really bad shape. Planting some fruit trees while I'm at it doesn't sound like a bad plan either.
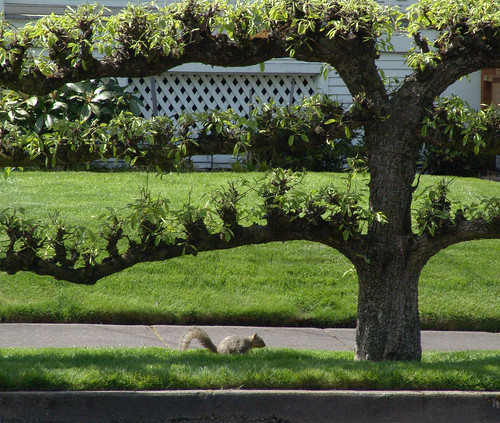 (Photo by sillydog)
I don't have any experience with espaliering fruit trees, and reading really doesn't cut for some of the more visual gardening practices. Fortunately, I found this great video that takes you through the process step-by-step. The guy's a little goofy, but it's a well-made video. Hope you enjoy it as much as I did.
Monday, July 07, 2008
After a short hiatus, I'm back! It seems one of my firefox extensions was messing with the Blogger layout, and it was making it difficult to blog. I finally weeded it out this morning though (and that was far from the last thing I weeded).
But first thing's first: the maraschino cherries are done! I provided a link to the recipe at the end of the last post. It's a 3-day process, but most of that is just waiting. After the initial soak, you boil them once each day, and on the final day you can them in a water bath canner. Mine turned out great! I've got six pints with a few left over that wouldn't fit in my jars. Those are sitting in my fridge, slowly being devoured.
The cantaloupe row is doing awesome. That garden claw really did the trick. There were weeds coming up, but they came out easily. It only took about 5 minutes to weed the entire 100 ft. row. I started working on the cucumber row with the garden claw. Hopefully we'll have mulch soon.
Today I ended up with raspberries. It's still a little early, but I should have enough to freeze a quart-sized bag full. They'll make awesome breakfast smoothies when I'm running out the door to class.
I'll write more when I have the energy... which definitely isn't today.
Wednesday, July 02, 2008
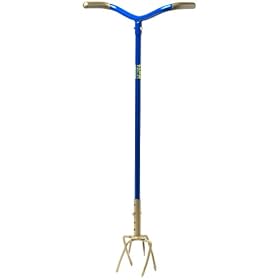
Back when I watched TV, I used to see infomercials for these things all the time. The Garden Claw, that is. We have a few of them sitting around at the farm (underused, if I may say so myself), so I decided to give one a try.
We have an unmanaged hill to the west of the gardens, and the grass, horsetails, and 4-foot-tall thistles rain down an unholy mess on my lovely row of cantaloupe, which happen to be right next to the hill. It's an organic farm, which I appreciate... but the weeds get so out of control, especially in this row. It took two of us about two hours to weed it earlier this week. Short of dropping napalm on the hill, I was determined to get the weeds under control in this row. That's where the Garden Claw came in.
My plan was two-fold. I wanted to get up any of the roots that had managed to escape us during the weeding process, and I wanted to make it more difficult for weeds to get started (or, at least easier to pull up once they did start). My other option, aside from the Garden Claw, was a broad fork (a wide pitchfork-like tool with two handles used for breaking up compacted soil), but that wouldn't allow me to maneuver around the cantaloupe.
The Garden Claw worked surprisingly well, just press it into the ground and give it a twist to break up the soil in a 8-12" radius. It took me about an hour and a half to do the entire 100 ft. row, down one side and back, which is less time than it took to weed the bed. Of course, this is the first time this season that I really had to use my hands to do some hard work, so I got a bit of a blister on my palm. It's small and painless and will likely be gone in the morning, but if your hands aren't used to the work, I suggest you take it easy.
The only thing I really have to compare the Garden Claw to is a broad fork and a rototiller. The Garden Claw definitely does a better job of breaking up the soil than either of them, but it's at the expense time and energy. But, if you've already got plants planted, it's great for working around them, and it doesn't use any gas, which is a plus in my book.
In other news, today was a busy day at the farmers' market. I work at the information booth for the non-profit that organizes the market, and I run credit, debit, and food stamp purchases for the entire market. Today I bought nearly 5 pounds of cherries from one of the vendors, and I'm planning on making maraschino cherries. I'll go buy a cherry pitter tomorrow so I can get started on it. I've never made them before, but it's one of the recipes I got from the extension office website. I'll let you know how they turn out.
Tuesday, July 01, 2008
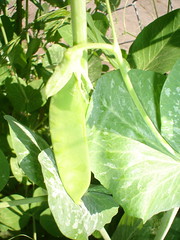
So, it's that time of year again, time for snow peas and clichés like "it's that time of year again."And I don't just mean a few snow peas. I'm talking about 2 hundred-foot rows of snow peas. I picked nearly a full 5 gallon bucket of the little suckers last week and then was informed that the second row was getting tilled up. The peas had shared the bed with radishes and 2 foot tall thistles, and they just weren't doing as well as the other row. So, I had the pleasure of pulling up the entire row and picking all of the peas off. Luckily for me this row wasn't doing as well, otherwise I would have had more peas than I knew what to do with.
It took me several hours to get these bad boys cleaned up and packed away in the freezer all by myself, but it'll be worth it when the school year rolls around and I have lots of yummy organic peas to eat.
The first thing you have to do is get them nice and clean. I dumped them all in my sink and ran the sink full of cold water. On my counter I set out my cutting board and a small paring knife with some large bowls to the left of the cutting board. I gave the peas a little scrub and placed them on the counter on the opposite side of the cutting board from where I'd be sitting. You might want to lay down some towels, otherwise you'll get a good puddle going (I just mopped it up after I was done). Once I got a good pile I sat at my cutting board and started trimming the ends off and tossing the pea pods in the bowls. After you master this fine art, you'll find that you can cut the ends off of two or three peas at a time. And remember, this is for sugar snap or snow peas only! The pods on other peas aren't edible, so you'll have to shell them.
When you've got all of your peas trimmed up get a big pot of water boiling on the stove. You'll need to blanch the pea pods for 2-3 minutes. A blanching basket would be nice, but I'm poor so I just removed the peas from the boiling water with a slotted spoon and plunged them into a sink full of ice cold water. This stops the cooking process.
After they're good and cool, just let them drain. I usually put a colander inside a large bowl and let the peas sit inside there for a while. From there, pack them into gallon freezer bags and load them into the freezer. I have five bags full and they're taking up most of my freezer and a portion of the community freezer in the res hall. Oh well, it's summer so nobody else is here.
If you find any good recipes, send them my way. I usually make soups or stir-fry with mine. This mint and pea soup is looking really good, but I'd have to substitute for the dairy.

(Have you noticed that I've been using a bunch of Flickr photos? My camera finally died after surviving several years of my abuse, including all of those backpacking trips. R.I.P.)
Monday, June 30, 2008
I was checking out reviews for pressure canners earlier today, and one thing that people kept saying was to get the pressure gauges checked by the county extension office. I'd never heard of such a thing, so I decided to look into it.
The USDA website provides you with a nifty little map for finding your local extension office. Here's what the USDA has to say about extension services:
The Cooperative Extension System is a nationwide, non-credit educational network. Each U.S. state and territory has a state office at its land-grant university and a network of local or regional offices. These offices are staffed by one or more experts who provide useful, practical, and research-based information to agricultural producers, small business owners, youth, consumers, and others in rural areas and communities of all sizes.
The website for my local office is loaded with information on preparing and preserving local fruits and vegetable, etc. And guess what I found there? Oregon grape jelly. I always thought our good ol' state flower was useless for anything more than looking at, but apparently with enough sugar these little berries make an awesome jelly. All kinds of places use these things in landscaping including, you guessed it, my very own university. On top of that, they're getting ripe. One of these nights I'll go out and pick the bushes clean and then I'll make me some jelly.
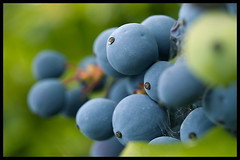
It really is simple. You just boil the berries in water and then let them drip through a jelly bag. After that you add 3 parts sugar to 4 parts juice and boil again. Put this concoction in jars and then can it and voila, Oregon grape jelly. I'll let you know how my experiment goes.
I've been working out at the university's farm for over a month now, and things are starting to come along. Since I'm getting back into the swing of things, I thought I'd share what I've been up to.
The window garden has taken on a new look this season. The new apartment isn't as Topsy Turvy friendly as the old dorm room, so I'm sticking with just the window boxes this time. I have loose-leaf lettuce growing in one of my four boxes and I pick it off as I need it for tacos, sandwiches, wraps, and burgers. I've had one basil plant going for a few months now, and it's been producing more basil than I can use. Ignoring that fact--and anticipating a good tomato harvest--I planted my remaining window boxes with basil. I hope to make lots of pasta sauce this year since pasta is probably the number one staple of this college student.
That means I'll be canning! Since I get all of the free produce I can stand from the farm where I work (and since so much of it went to waste last year because no one used it), I've been getting really excited about preserving the stuff that I harvest.
First, the research. Even though we helped our grandparents can vegetables every summer, I hadn't paid much attention to the details. We canned lots of pickles (both beet and cucumber), but it turns out that canning and pickling are two separate things. Who knew? Pickling typically uses salt and vinegar to preserve food. Canning heats the food in question and seals the jar that contains it. The things that I've read say that pickling will preserve your food for "several weeks" (and that's the best estimate I've seen so far). I go to CanningUSA.com for canning recipes and instructions, and they suggest using your canned food within a year to keep it from losing its nutritional value.
Additionally, I've found more than one way to pickle. You can drench your cucumbers in vinegar and various spices as I grew up doing, or you can pickle them in a more traditional sense by leaving them to ferment in a jar. People refer to these as "live" or "living" pickles. I stocked up on cucumbers at the cafeteria's salad bar and used Lynn's Favorite Fermented Pickles recipe as the basis for my own concoction. I didn't have the pepper flakes or the green onion so I just omitted them. I also guessed on the number of cucumbers I had since they were already sliced. I love garlic, so I added way more than the recipe called for. End result: I overestimated the amount of cucumber I had so these turned out a little saltier than I would have preferred. And did I mention that I went overboard on the garlic? It was a bit much, even for a garlic-lover like me. After just one slice you could have cleared a room of an army of vampires. They were still edible though, so I finished them off one-by-one. The next time I try these I'll make sure I'm using the proper proportions of ingredients.
Since then I've pickled beets, for which I found no recipe for living pickles. I roasted the beets at 400 degrees in the oven in about a 1/2 " of water for an hour or so (trim off all but an inch of the greens, but leave the ends otherwise intact). After you pull them out and they have a chance to cool, cut off the ends and peel off the skins. I actually sliced the beets 1/8-1/4" thick and then peeled the skins off and found that this was much easier. This is very messy and beet juice will stain like mad. Wear clothes you're willing to sacrifice! Pickle recipes I've seen haven't been as anal about sterilizing jars as canning recipes, so I grabbed an old pickle jar (the big ones you buy whole pickles in at the store) and packed the beet slices in. In a sauce pan I heated three cups of sugar and three cups of vinegar until the sugar melted and then stirred in cinamon to taste. Add this to the jar of beets until they're covered. The directions say to let them sit a few days, but that didn't keep me from getting into them the next day. Try to limit yourself to about 4 or 5 slices a day otherwise your bodily wastes will be dyed a purplish-red. This isn't any cause for alarm as far as I know, I just find it unnerving to have strangely colored fluids coming out of me.
That's it for now. I've done a little other preserving, but I haven't canned anything yet. I did, however, pick up jars, a water bath canner, and all of the necessary accessories when I picked up vinegar for the beets. The next batch of beets I pick will probably be canned whole or in quarters, and I'm looking forward to all of those tomatoes.
More next time.
Wednesday, January 23, 2008
These days, people seem to be squeamish about human wastes. I won't lie and say that I'm not one of them (I was raised that way after all)... but I do understand the importance of putting back whatever we take from the earth. Enter the composting toilet.
As the name implies, the purpose of a composting toilet is to compost human wastes, or humanure. "Ewww" might be the first response, but animal wastes are a common garden fertilizer, and human waste is no different. Since I won't have any animals, it's human waste or no waste for me.
John Seymour explains the logic of the composting toilet (he calls it a dry toilet, and his specific design is the Thunderbox loo) in The Self-sufficient Life and How to Live It. Flush toilets are expensive, and not only waste water with each flush, but add pollutants to otherwise drinkable water. The nutrients in humanure are a necessary component in maintaining soil fertility, but with the simple push of a lever it's out of sight and out of mind.
I really wish you could see the picture that John included in his book. My description just won't do it any justice. A small building or room is built with a space left underneath for the collection of waste.Two holes are cut in the floor, and the actual toilet sits on one hole at a time. After the first hole is filled, the toilet is moved to the second hole and the first is left to compost. Ventilation pipes take gases and smells away from the composting compartment. After each person takes care of business, they just add a cupful of sawdust or other such material to keep the consistency just right.
I've actually had the pleasure of using one of the Self-contained Sun-Mar composting toilets this summer when I worked out on the farm. Contrary to what you might think, it's actually very clean, easy to use, and free of odor. You can also get toilets that look like normal toilets and have a compartment under the floor for catching the wastes, whereas the Sun-Mar toilet I linked to does the actual composting itself.
To go along with all of this info is a story I heard on the topic. I don't know if it's myth or reality, but supposedly Japanese farmers put a lot of effort into creating very ornate and very beautiful outhouses that they would place out by the road. Human waste was such a valuable resource to the farmers that they wanted to attract anyone that was traveling by to come leave precious fertilizer that they could use on their farm. Crazy? Even if it is, it still makes perfect sense from the point of view of a self-supporter.
Tuesday, January 22, 2008
I wasn't surprised to see a posting about a school with the environment in mind. I was, however, surprised to see that it was in Oregon. Not, of course, because it's not something Oregonians would fully support, but because I had already witnessed the creation of another such school.
I've had extensive opportunities to work and take classes with Terry O'Day, one of the founders of the Forest Grove Community School. The school serves students age 6 to 14, and provides them with a hands on education out in the real world. From the school's website:
Life lessons are learned by living. So, we created a school in which the students and teachers take the classroom into the world. Yes, they will study reading, writing and arithmetic (and much more), but the lessons will be held in the school garden, the wetlands, or downtown as well as in the classroom. These lessons will have impact, meaning, and lasting value because they are hands-on, here at home, dealing with real life issues.I've supported the school ever since I first learned about it. I even started using GoodSearch with Forest Grove Community School set as my charity (and you should too!). It's because I feel school's like these are part of an important transition away from excessive consumerism and toward self-reliance (especially since Terry has been such a big influence on me, and has had her hand in developing this school from the beginning).
It's not only that. What about our own children? I don't have any of my own right now, and homeschooling could certainly be an choice I do, but is it the right choice? Some of us may not have the choice if we get as far off-grid as we'd like. For the rest of us, I think public schools have certain benefits, if they have the right mindset like these eco-schools seem to have.
Schools offer children an opportunity to develop friendships, social skills, public speaking skills, conflict management skills, teamwork, and more. Unless you have lots of kids, they might not get the opportunity to develop all of these skills. Not to mention, schools are going to provide children with necessary extracurricular activities. Kids need to experience different people and things.
And homesteading, for me at least, is not about disappearing from civilization. It's about going back to a time when people provided what they needed and helped those that couldn't. We're only as strong as our weakest link, so we have to help our weakest link be strong too. If our children grow up without having to develop these kinds of ties with each other, then what will their quality of life be like.
These eco-schools provide us with the best of two worlds. They share our enthusiasm about stewardship for the environment and working with our hands, but they also provide the community building and social skills necessary to make future generations work as "we" rather than as "me".
Monday, January 21, 2008
There are some sites that prove to be immensely helpful to me on the road to self-sufficiency. For some, it's the information they provide. For others, it's the services. Here's a list I've put together of useful sites to help you immerse yourself in the green life.
1. Hugg.com
Hugg.com is a social environmental news site that mimics Digg.com. Anyone can browse through pages of user submitted links to information on recycling, organic food, alternative energy, and so much more. Best of all, accounts are free, so you can add your own eco-news (and they even recommend news to you based on the news you post)!
As a side note, I've created a Hugg.com feed flare unit, so if you use FeedBurner to resyndicate your environmental blog, you can add the Hugg This! link to the end of each of your posts.
2. Green Dimes
Green Dimes is a great service that I found a little over a year ago. The website will remove your name and mailing address from all of the bulk mailing lists (you know, the ones that send you credit card and insurance offers, and all that jazz). I signed up and have been junk mail free. You can even choose which catalogs you wish to stop receiving. Not only that, but they also plant 10 trees in your name! Not only are you saving lots of trees from being chopped down to be turned into paper (and eventually your junk mail), but they're also planting trees to replace the ones that already have!
Submit your e-mail address in the box below, and they'll plant an additional 20 trees when you sign up, just because I referred you!
3. First Look
I've mentioned First Look once before, in my alternative energy post. First Look is a web service for assessing your wind and solar potentials at a given address or set of coordinates. Thinking about installing a wind turbine or solar panels on your property? Check out First Look first to see if you have what it takes.
4. YouTube
It must seem like a bit of a cop out to list YouTube on my list of sites for homesteaders, but it is really immensely useful. Most people just use YouTube as a source of entertainment, but search for How-to videos and you may be surprised about what you can find. I did find excellent instructions on processing flax after all.
5. Freecycle.org
You might be able to provide everything you absolutely need, but a little help from the outside can make life a little more comfortable at the very least. Freecycle is a service that connects people that have things with people that want things, all for free! People post things that would otherwise just get thrown away, and then people in the community (it's seperated by city or county) can come and get them. You can also post ads to find someone that has what you need. There's absolutely no selling or trading though. Everything you give or get is 100% free (check out craigslist.org if you're interested in buying, selling, or trading). I always see posts for bricks, wood, fencing, topsoil, and more... perfect for the do-it-yourselfer.
6. Off-grid.net
I recently found Off-grid.net when searching for homesteading resources. The site offers a lot of great articles on a wide range of "off grid" issues (off grid meaning to live without having water and electricity provided for you by utility companies). They have a classified section that has offers for everything from biodiesel to green homes. There's also a forum on the site that I haven't poked around in yet, but I will soon.
7. WWOOF.org
WWOOF stands for World Wide Opportunities on Organic Farms. WWOOFing is the practice of volunteering at an organic farm in exchange for food, housing, and organic farming experience. As a student I was able to partake in a WWOOFing experience this past summer at my university's farm. I highly recommend it. It provides the most valuable experience you could ever gain, and you get all kinds of fresh produce to boot. I ate like a king this summer (the university didn't allow the sale of the produce, so the 5 of us that worked the farm with the occasional help from volunteers got the entire harvest to ourselves). WWOOF.org gives a list of international WWOOFing organizations. Go to WWOOFUSA.org for a U.S.-specific site.
8. One Green World
This particular site might only be relevant to people in a climate like mine, but it might inspire you in your gardening endeavors. It's a website for a nursery here in Oregon that has a lot of exotic plants. I've never seen anyone growing figs, kiwis, tea, pistachios, or pomegranates in Oregon, but apparently it's possible. You might just come to find that you actually can grow those things that you thought you'd have to go if you were providing everything for yourself.
Saturday, January 19, 2008
I mentioned in a previous post that one of the things I'm interested in doing is building an earth oven. I first got excited about the topic when I read Build Your Own Earth Oven for an Eco-Art class that I took here at the university. Unfortunately, we couldn't get the go ahead from the administration to actually build the oven on the university-owned organic farm. It's still something I want to do on my own time, and an earth oven is certainly something I would constantly use in my self-sufficient life.
A quick image search uncovers some of the amazing artistry that can go into building an earth oven. I think that's part of what intrigues me: not only is it something practical, but it's something you can also get crazy with artistically.
The book I mentioned is a great resource. It covers the science behind both constructing and cooking in an earth oven, explains different types of earth ovens, and then gives instructions for building an earth oven for yourself. Basically, you create a form out of sand or some material you can burn out of the oven, and then you cover it with a mixture of sand, clay, and straw. But it can get way more complex as you add insulation and surface area for trapping heat, chimneys, storage for wood, a little chute for disposing of ashes, etc. And the book is fully illustrated to boot.
Even if you have no intention of building your own oven, the section on making your own bread with natural yeasts is superb. It covers making the dough, and then how to cook it to get pita, pizza dough, and artisan breads. This section alone is worth it, and I'm constantly using the information I gained to make bread in my conventional oven here in my apartment.
Keep your eyes peeled for any other books you see on the subject... I'm certainly interested in reading them. Also, if you find any good pictures, I love to see how artistic people get with their ovens (or innovative for that matter, as I've seen people use waste heat from earth ovens to heat water pipes).
Friday, January 18, 2008

I had a couple of things going for me. First, I had a south facing window, which means I had sunlight for the greater part of the day (although, the inconvenient placing of a tree stole part of it from me). Second, I had very wide windows.
I couldn't just hang my Topsy Turvy planters in any old way, since I was renting the dorm room and would have to pay for any damages. What I did was, I got a wooden dowel from the local lumber yard, and Adjustable Shower Rod End Flanges from the local hardware store (these have rubber ends, and you twist them to add more tension, and thus secure the wooden dowel in the window sill). The link for the flanges is just an example, they actually only cost me $2-3 at the hardware store. I then cut the dowel to size -- the saw on my pocket knife, no less--according to the directions that came with the flanges, and then secured it in place. I drilled a large hole through a board and placed it in the middle of the dowel to add extra support for the planters, as they can be quite heavy.

With the Topsy Turvy you either have to get plants that are already started, or start them yourself. You cannot grow from seed inside the planter. Add some soil to the planter, shake most of the dirt off of the plants roots, and insert the plant according to the instructions that come with the planter. Soil will settle after you water it, so be sure to add more than you think you need (or add it after you hang the planter).
Here's a shot of my freshly planted garden, which includes my tomato and cucumber plants inside the Topsy Turvies (they're not just for tomatoes after all), and then green onions, lettuce, radishes, and Parisian Market carrots (which grow round like radishes rather than long like typical carrots) in window boxes. My tomato and cucumber are both early season varieties so that they don't require as long (or as much sun) to mature and they're also compact varieties that have been developed to grow in containers in tight spaces.

And a few from later in the season when growth had really taken off (it's not the best photo in the world, but you can sort of see some of the small cucumbers in the second photo):

 Unfortunately, this was my first attempt at container gardening, and it was indoors to boot. I was guilty of both over and underwatering my plants. I did combat this some with the Topsy Turvy by cutting the top off of a gallon jug, and then cutting small holes into the bottom which I stuffed with bits of paper towel. I could then just keep the jug filled up and it would slowly wick water into the planter (this also kept water from dripping all over my window sill, since it didn't land in the window boxes as much as I would have liked).
On top of the watering issues, the tomato just wouldn't put on very impressive fruit. Got quite a few blooms, but there was either a lack of sun, a lack of fertilizer, or both. That didn't surprise me though. We had an unusually cool and cloudy summer, so even outdoor tomatoes struggled.
Ultimately, what killed my Topsy Turvy plants was the fact that I had to move during the growing season. Because the plants grow out of the bottom of the planter, they're very difficult to move over long distances... especially if you have no way to hang them up once you get where you're going. The plants were severely damaged in the moving process and never recovered. I'm eager to try again this year though, because I should be able to stay in one place throughout the growing season. After all, my indoor veggie garden wasn't a total failure:


Thursday, January 17, 2008
Another topic that is of interest to me as a would-be homesteader is alternative energy. Many will say that plants, that store energy from the sun, are our greatest sources of renewable energy. After all, people burned wood as fuel long before the explosion of the oil market.
When one thinks of solar power, one's mind probably first turns to photovoltaic cells, or solar panels, which stores the suns energy as electricity in batteries for later use. Photovoltaics aside, however, there are still many ways of harnessing the sun for filtering water, heating water, drying food and passively heating one's home. A Trombe wall, for example, utilizes a south facing window--which will receive sunlight almost all day as the sun moves from east to west--and a thermal mass to trap heat during the daylight hours and then let it out at night to keep your house warm. Books that I've read that give a good break down of using solar energy both actively and passively include John Seymour's The Self-sufficient Life and How to Live It and Robert Ristinen's Energy and the Environment. Other books I'm interested on reading on the topic of alternative energy include The Homeowner's Guide to Renewable Energy: Achieving Energy Independence Through Solar, Wind, Biomass And Hydropower (Mother Earth News Wiser Living) and The Renewable Energy Handbook: A Guide to Rural Energy Independence, Off-grid And Sustainable Living, which addresses people who live in rural areas and would like to provide all of their own energy.
In my particular location, I would probably have a wood stove for heating and cooking (as well as an earthen oven, which I'll cover in a different post), and then a combination of wind and solar would provide whatever electricity I still needed. Firstlook is a neat web app that estimates your wind and solar energy potentials, but there are professionals that can give you an assessment of your power need and potential. And in most places, if you have a surplus of electricity, you can sell it to the power company. Wind turbines are sold in kits for the real DIYer, or can also be installed by a local company, which is probably best for those of us that aren't electricians.
I might seem out of place when I take up a pair of knitting needles and start knitting away since I'm a 20-year-old heterosexual man. But that's how seriously I'm taking this journey to self-reliance: I don't want machines and businesses providing the things I need to survive. For me, this is just the first step in learning how to provide myself with the things I need (like clothing). I found the following video that goes over the most basic steps in learning how to knit, and even though I'd received needles, a ball of yarn, and a knitting lesson for Christmas, it was nice to see something a little more structured (even if a little bland):
Knowing what to do with yarn is just the first step. For me, the next step is providing myself with my own yarn rather than purchasing it from the store (which could get very expensive very quickly). There's plenty of information out there about cotton, hemp, and wool; but I can't use any of these. Cotton won't grow in this climate, hemp is illegal to grow, and even if I weren't vegan, I don't have the resources to raise animals for wool. I found my answer in The Self-sufficient Life and How to Live It by John Seymour. The answer was flax.
Flax seeds are becoming popular as a "health food" in these parts at least. They can be used whole, ground into meal, or even pressed for oil. The stalks, however, are very fibrous and have been used in many other parts of the world for creating fibers for clothing, rope, etc. The history of the flax industry in Oregon seems to have some pretty violent and highly political roots, so it never really took off. However, for the self-supporter, flax seems to be a good alternative when cotton, hemp, and wool are not options. I found the following videos that describe how to process and then spin flax, though it seems in this day and age, the tools would have to be built by hand:
I find the videos immensely helpful, but written instructions can also be found in The Self-sufficient Life and How to Live It and on the All Fiber Arts webpage.
Coming to college has taught me a lot, though not necessarily about the subjects I've been studying. But those too have helped shape who I am and what I'll will be doing with myself over the course of my life.
The climate is changing, whether you want to think we're causing it or not. I've witnessed more snowy days so far this year than I have at any other point in my 20 years here in the Portland area. Two summers ago I experienced the most intense heatwave that I've ever experienced, with temperatures well over 100 degrees for several days in a row, compared to our typical 80-90 degree weather. How are our large commercial food growers going to cope when the climate shifts in just such a way that they can no longer grow their prized crops?
Oil. Oil is a finite resource and we use it in everything. We're using it all up. You can see the evidence when you go to the gas pump and stare at the ever climbing prices. Supply and demand. When you have less of a resource, but demand remains constant, you raise prices. But it's not just gasoline. Plastics and many synthetic fibers are created from oil.
All plastic products, many of the materials used to make the clothes you wear, or the carpet you walk on, plus hundreds of the other products we take for granted, are made from petrochemicals. As the name implies, a main ingredient in petrochemicals is oil.Can we even imagine a world without plastic? It has only found its way into everything within the past half century or so, but here I am, staring at a stack of CD cases, a couple decks of playing cards in plastic cases, the keyboard I'm plinking away at, and so much more.
I'm not trying to be mister doom and gloom by any means. I find myself reminiscing. Where I used to be is so much closer to where I want to be than I actually am. As much as my old man and I don't get along, I miss the little garden he would grow on a small plot in our backyard so that we would have fresh produce every summer. I miss going to my grandfather's each summer and canning green beans and carrots, pickling cucumbers and beets (my grandmother's sweet pickles are still the only ones I'll eat), and making jelly out of raspberries and strawberries. I miss the fresh grapes, corn on the cob, green onions, tomatoes, and so much more. And I miss going down to the river to pick wild blackberries for pies and cobblers. Especially cobblers.
The school work that I'm subjected to lacks meaning. I may learn something worthwhile from it, but I cannot look at a 10 page essay and say "I have survived because I have written this paper. It has provided me with warmth and sustenance." Providing your own food and clothing may be hard work, but at least at the end of the day you can sit down to a home cooked meal and know that you are surviving because of the things you have done. Elsewhere we are dependent on businesses and machines to provide us with simple things such as food, clothing, and shelter. It's scary to think that without them, it is impossible for me to survive.
I'm doing something about all of this. I'm learning the skills I need to survive. If I had to rely on what I know right now I wouldn't last very long, but in time I hope to require a parcel of land that I can farm with friends and family. Together we will have the skills to provide everything we need to survive, and have enough left over to barter for what we'd like to have.
This blog is here to document my research on the topic of self-reliance, as well as my real world accomplishments and failures. Wish me luck, and utilize the information I find in order to make yourself more self-reliant.
